Contacts
Contacts
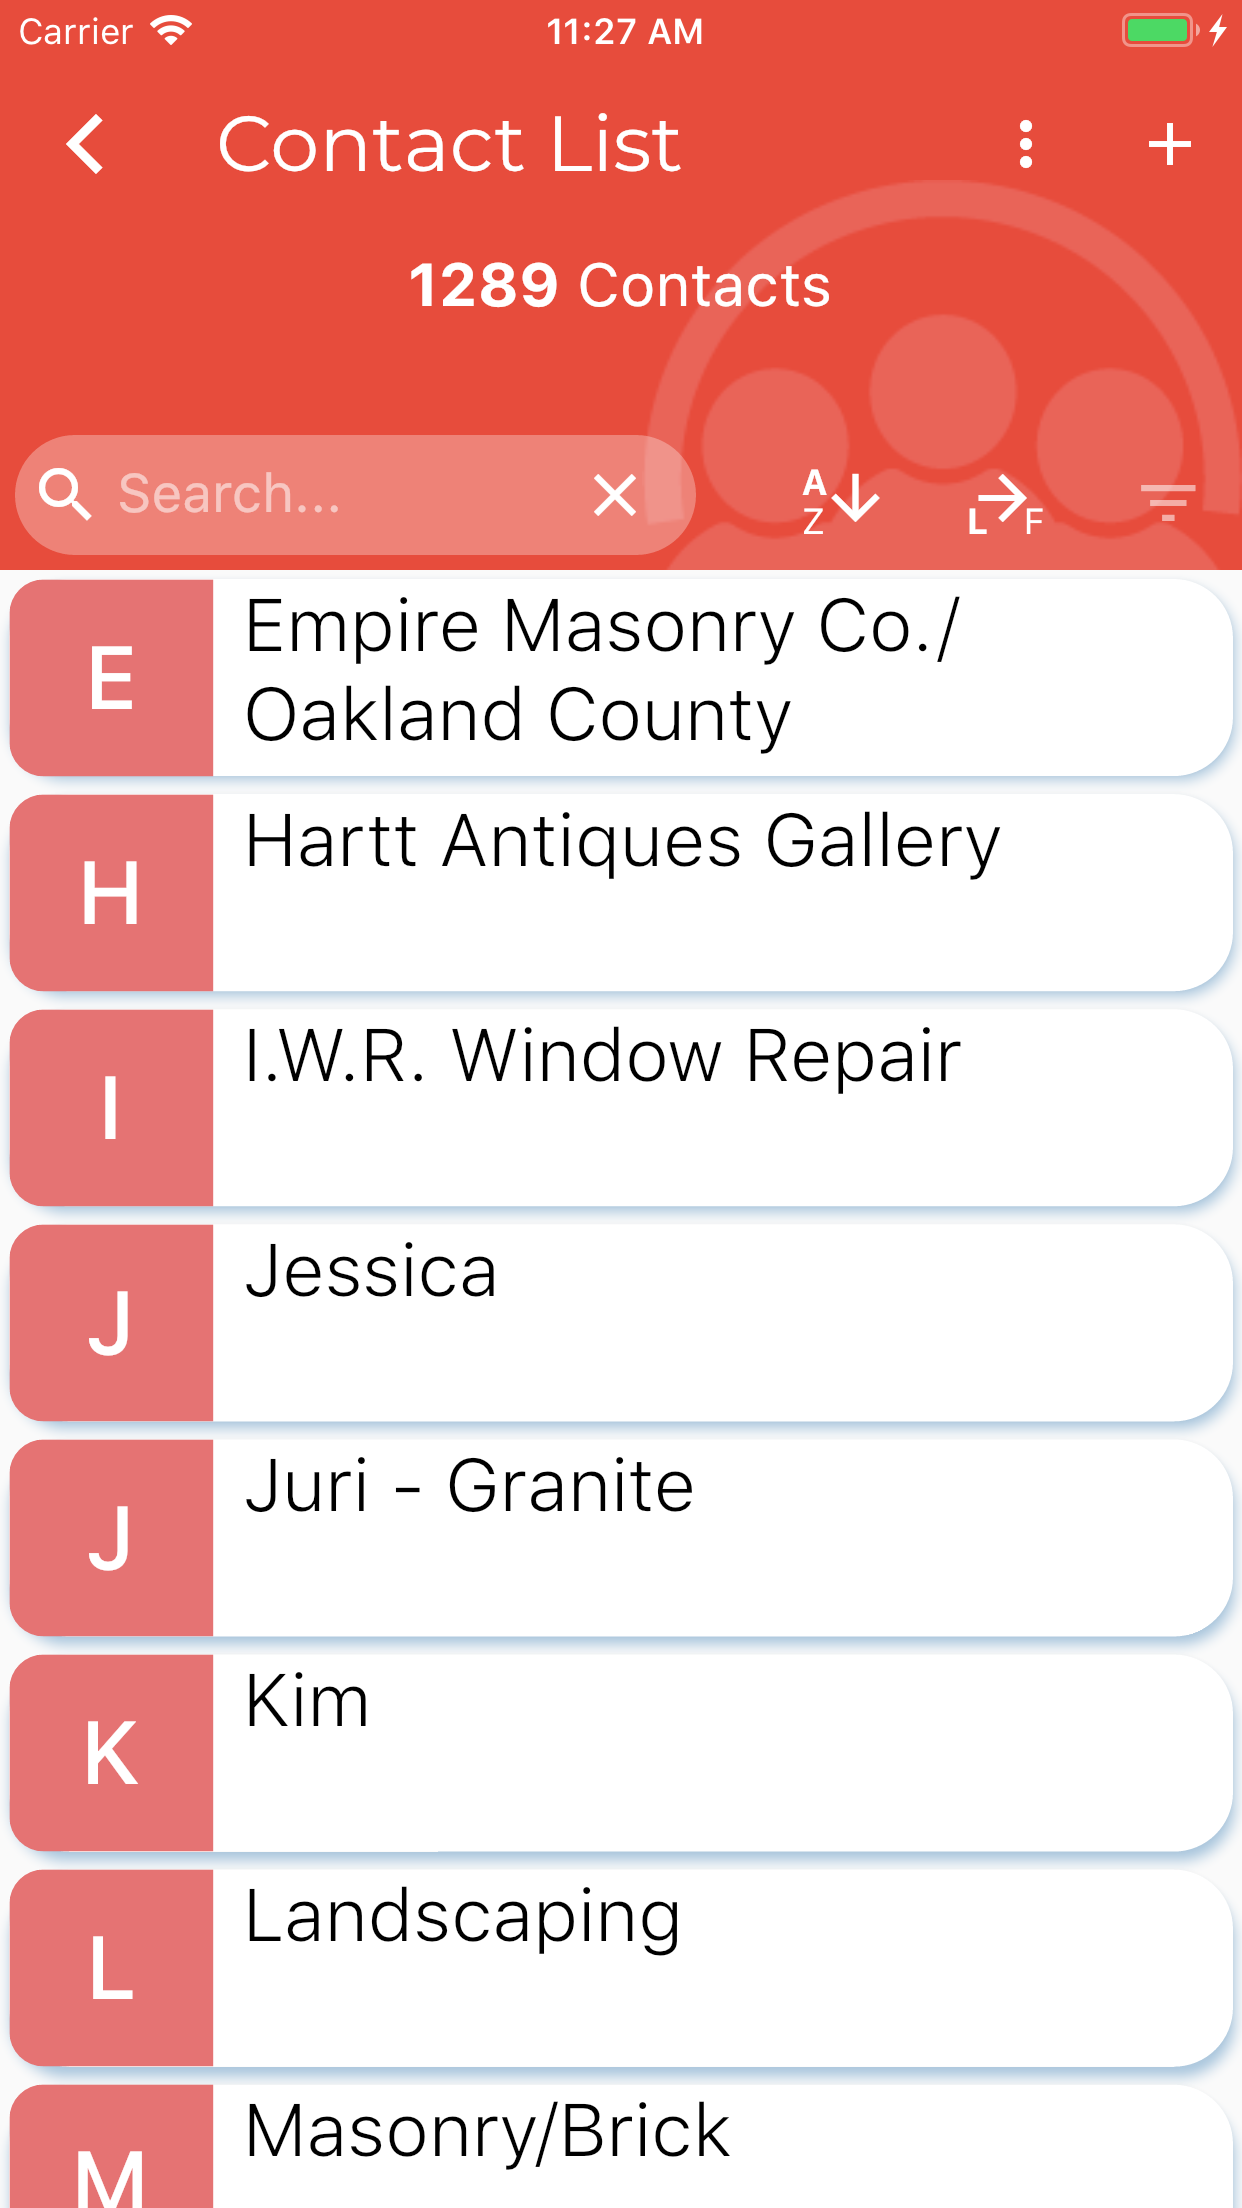
The contact list is the first screen that displays when you click the Contacts button on the main menu. This list can be Searched, Sorted A to Z or Z to A as well as viewing the contacts by First / Last Name or Last / First Name. Click the [+] button in the upper right to add new contacts or click on a contact to display the contact detail.
-
- Browse and search by contact first/last name
- Filter using Saved Filters with Long-Press reset
- Custom filters for Tags, Categories, Stage, Status, Dates
- Sorting by First or Last Name in Ascending or Descending order
- View/Edit Detailed information about a contact
- Start individual contact workflows
- Quick access to linked spouse / significant other
- View / Add contact notes (includes spouse / significant other)
- View to linked properties and transactions with drill-down access
- Click to Call with Native Dialer and Wrap-up Screen
- Update Last Call Date
- Add a follow-up activity to the calendar
- Start a workflow
- Touch the MAP to display driving directions
- Touch an email to send a NATIVE email
- Touch a website to browse that site
- Send Templated SMS Text
Contact Filters (v2.0.4)
![]() Filters allow the user to reduce the list of viewable contacts based on specific field criteria. Tap on the 3 lines that look like a funnel on the far right side to open the filter screen. Choose from a dropdown list of Saved Filters that were created in the main web app then click the APPLY FILTER button located in the lower right. To clear any filter simply long press on the filter icon or click the clear filter button once you are in the filter section.
Filters allow the user to reduce the list of viewable contacts based on specific field criteria. Tap on the 3 lines that look like a funnel on the far right side to open the filter screen. Choose from a dropdown list of Saved Filters that were created in the main web app then click the APPLY FILTER button located in the lower right. To clear any filter simply long press on the filter icon or click the clear filter button once you are in the filter section.
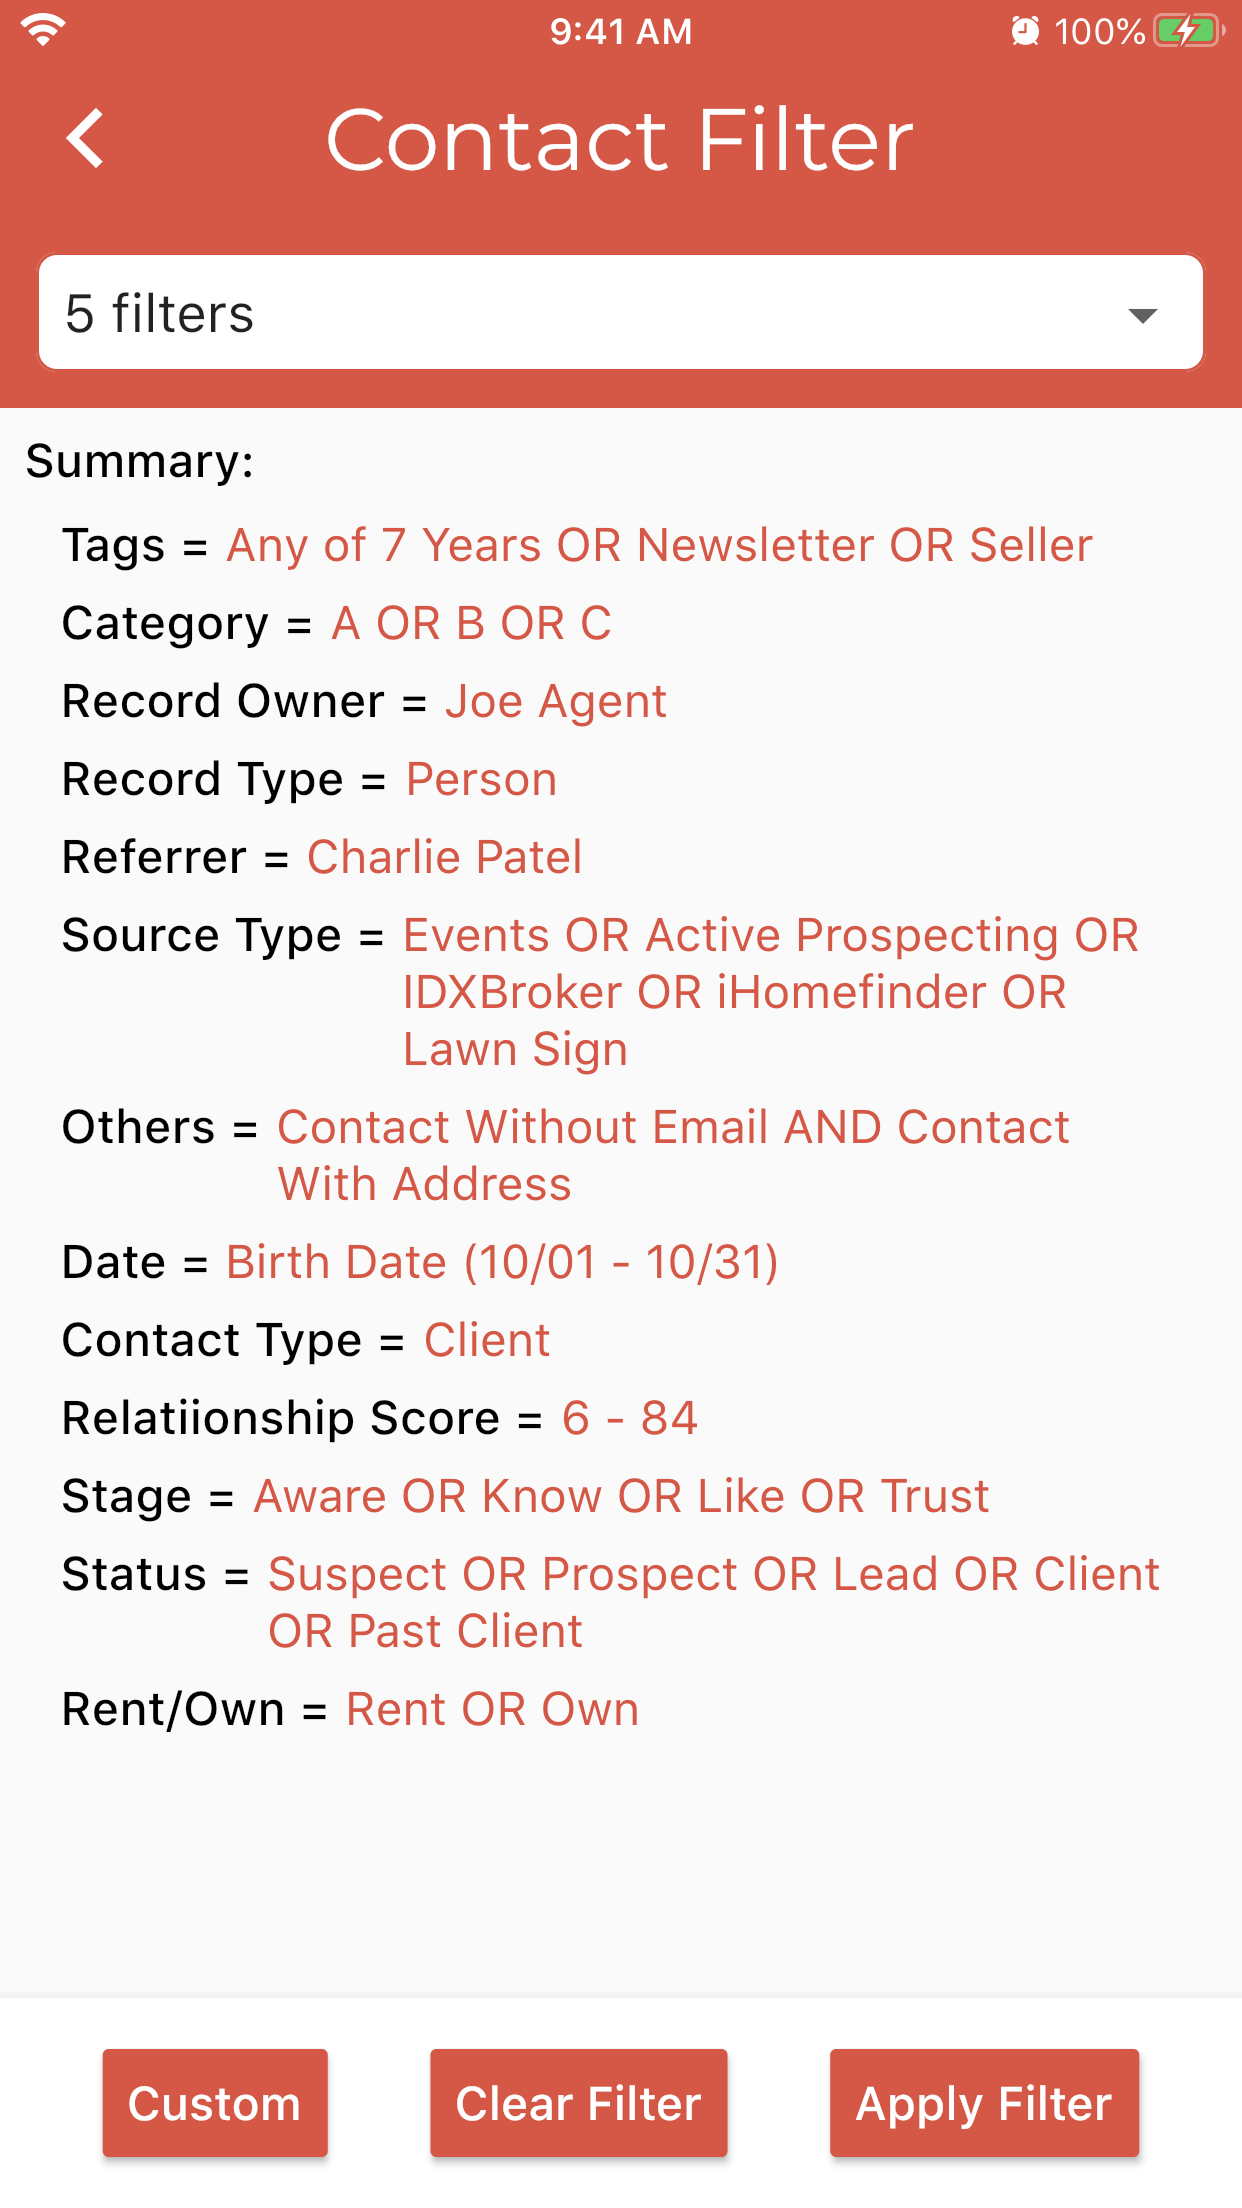
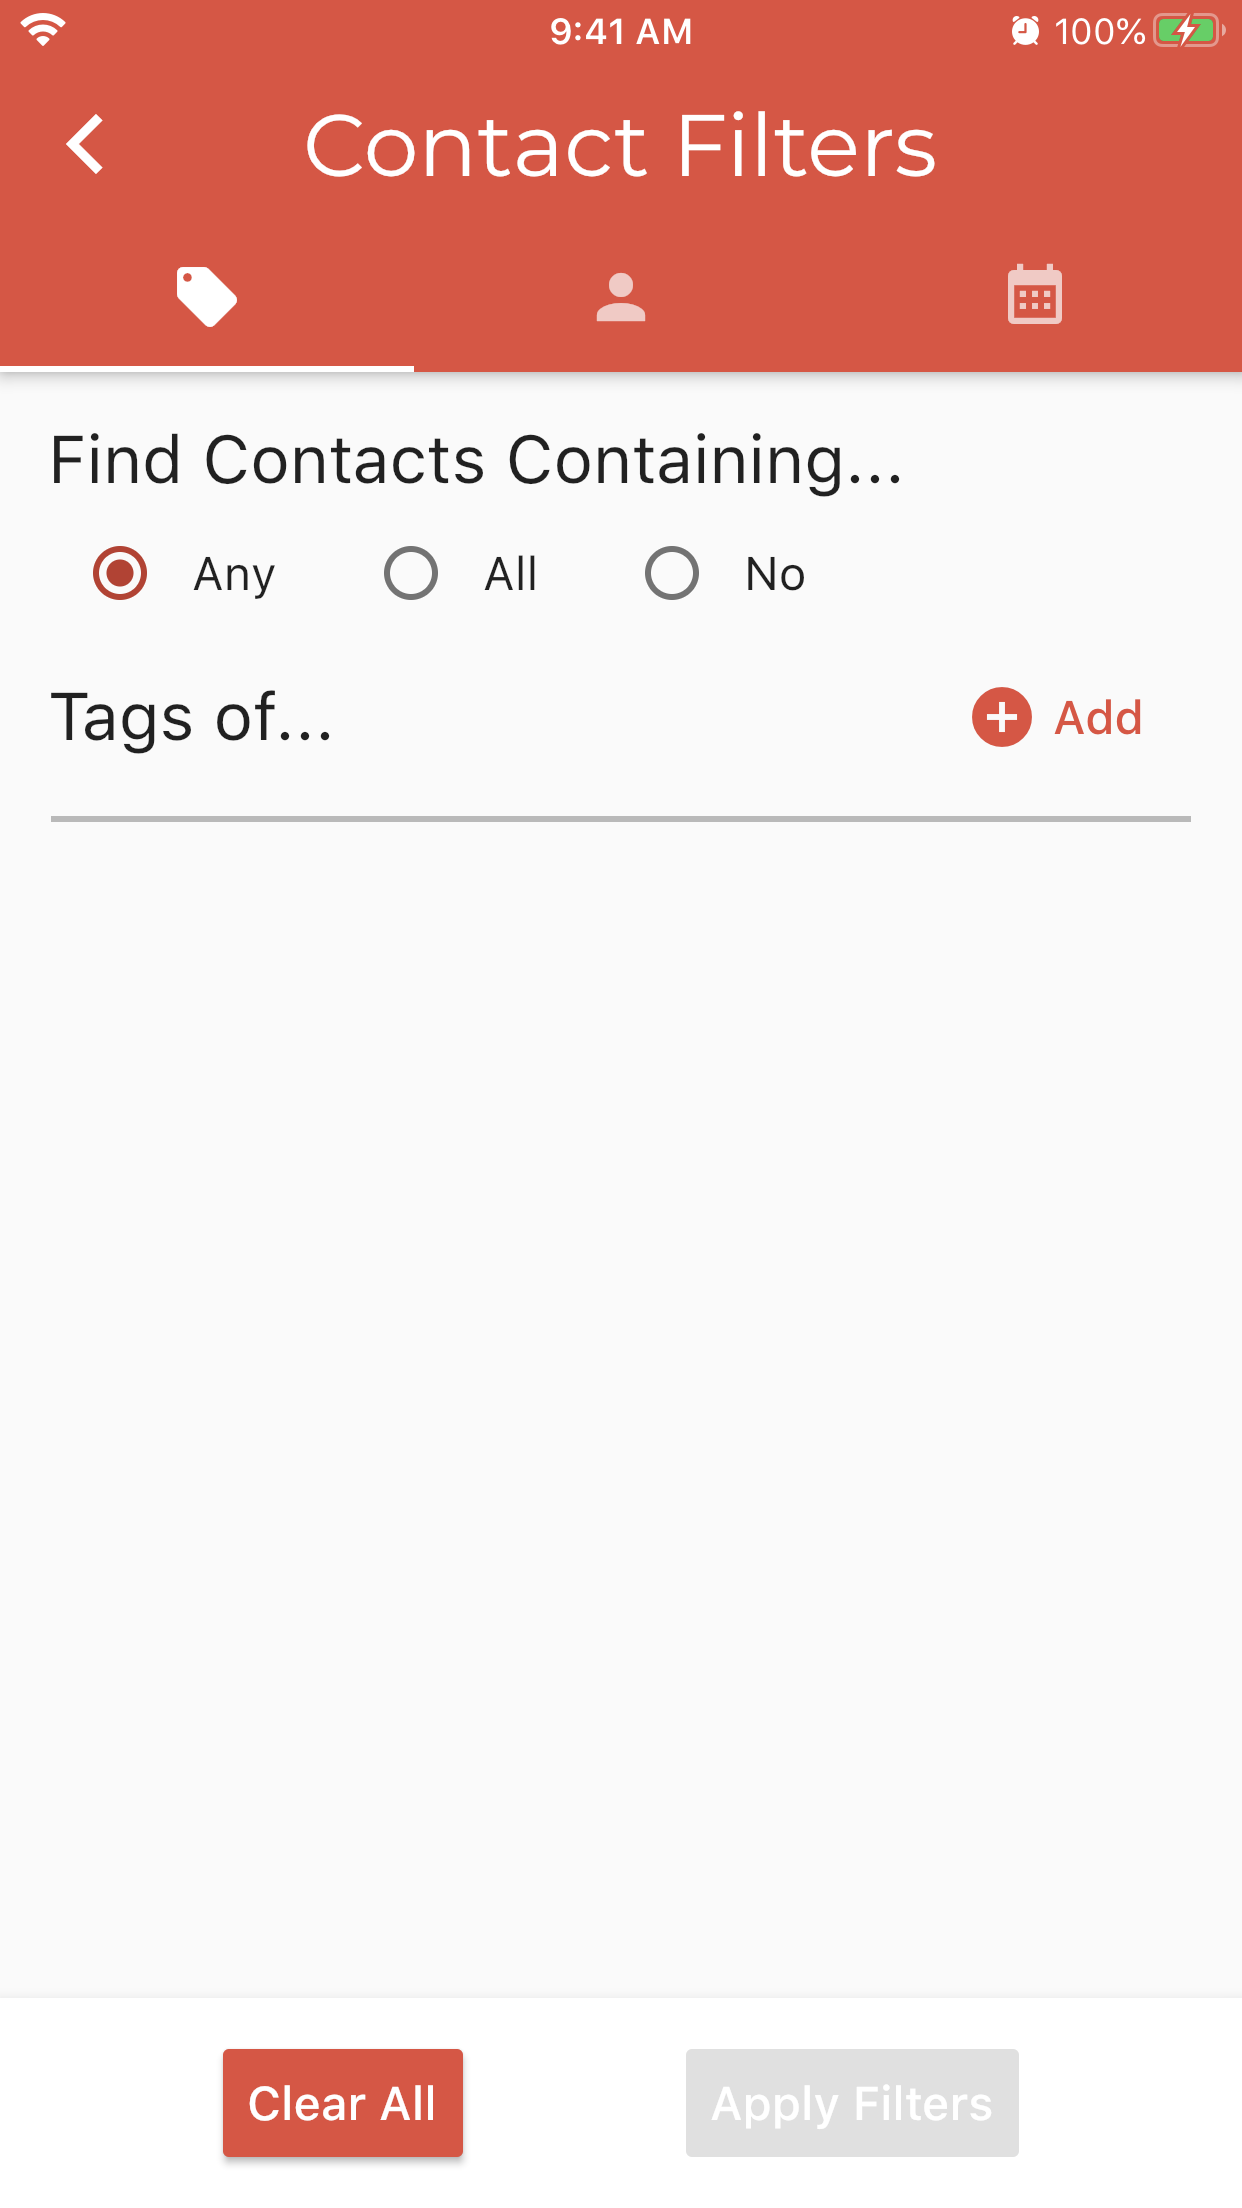
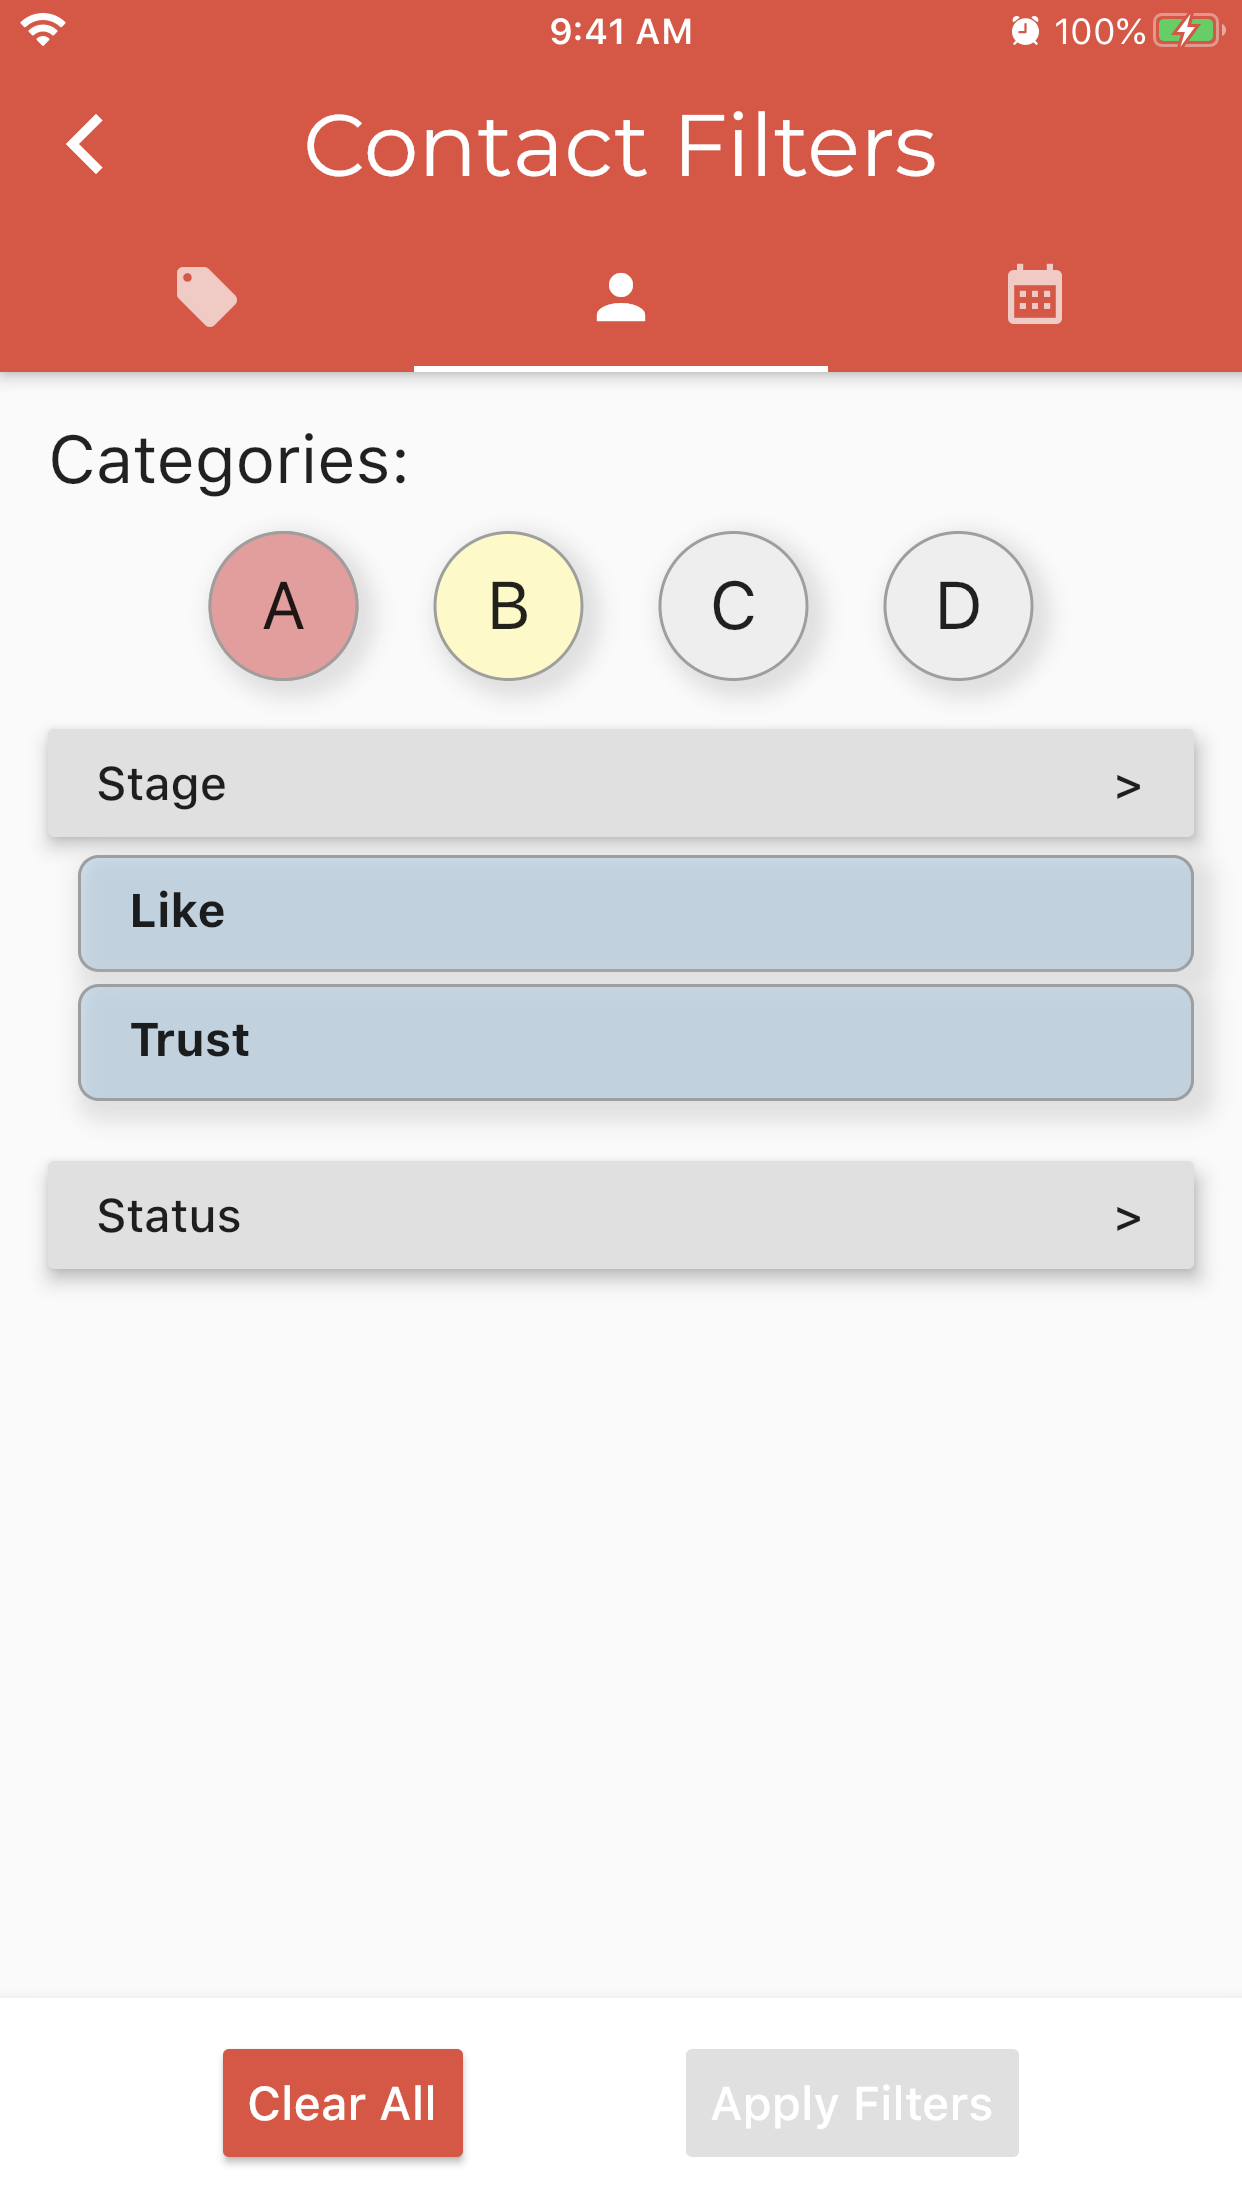
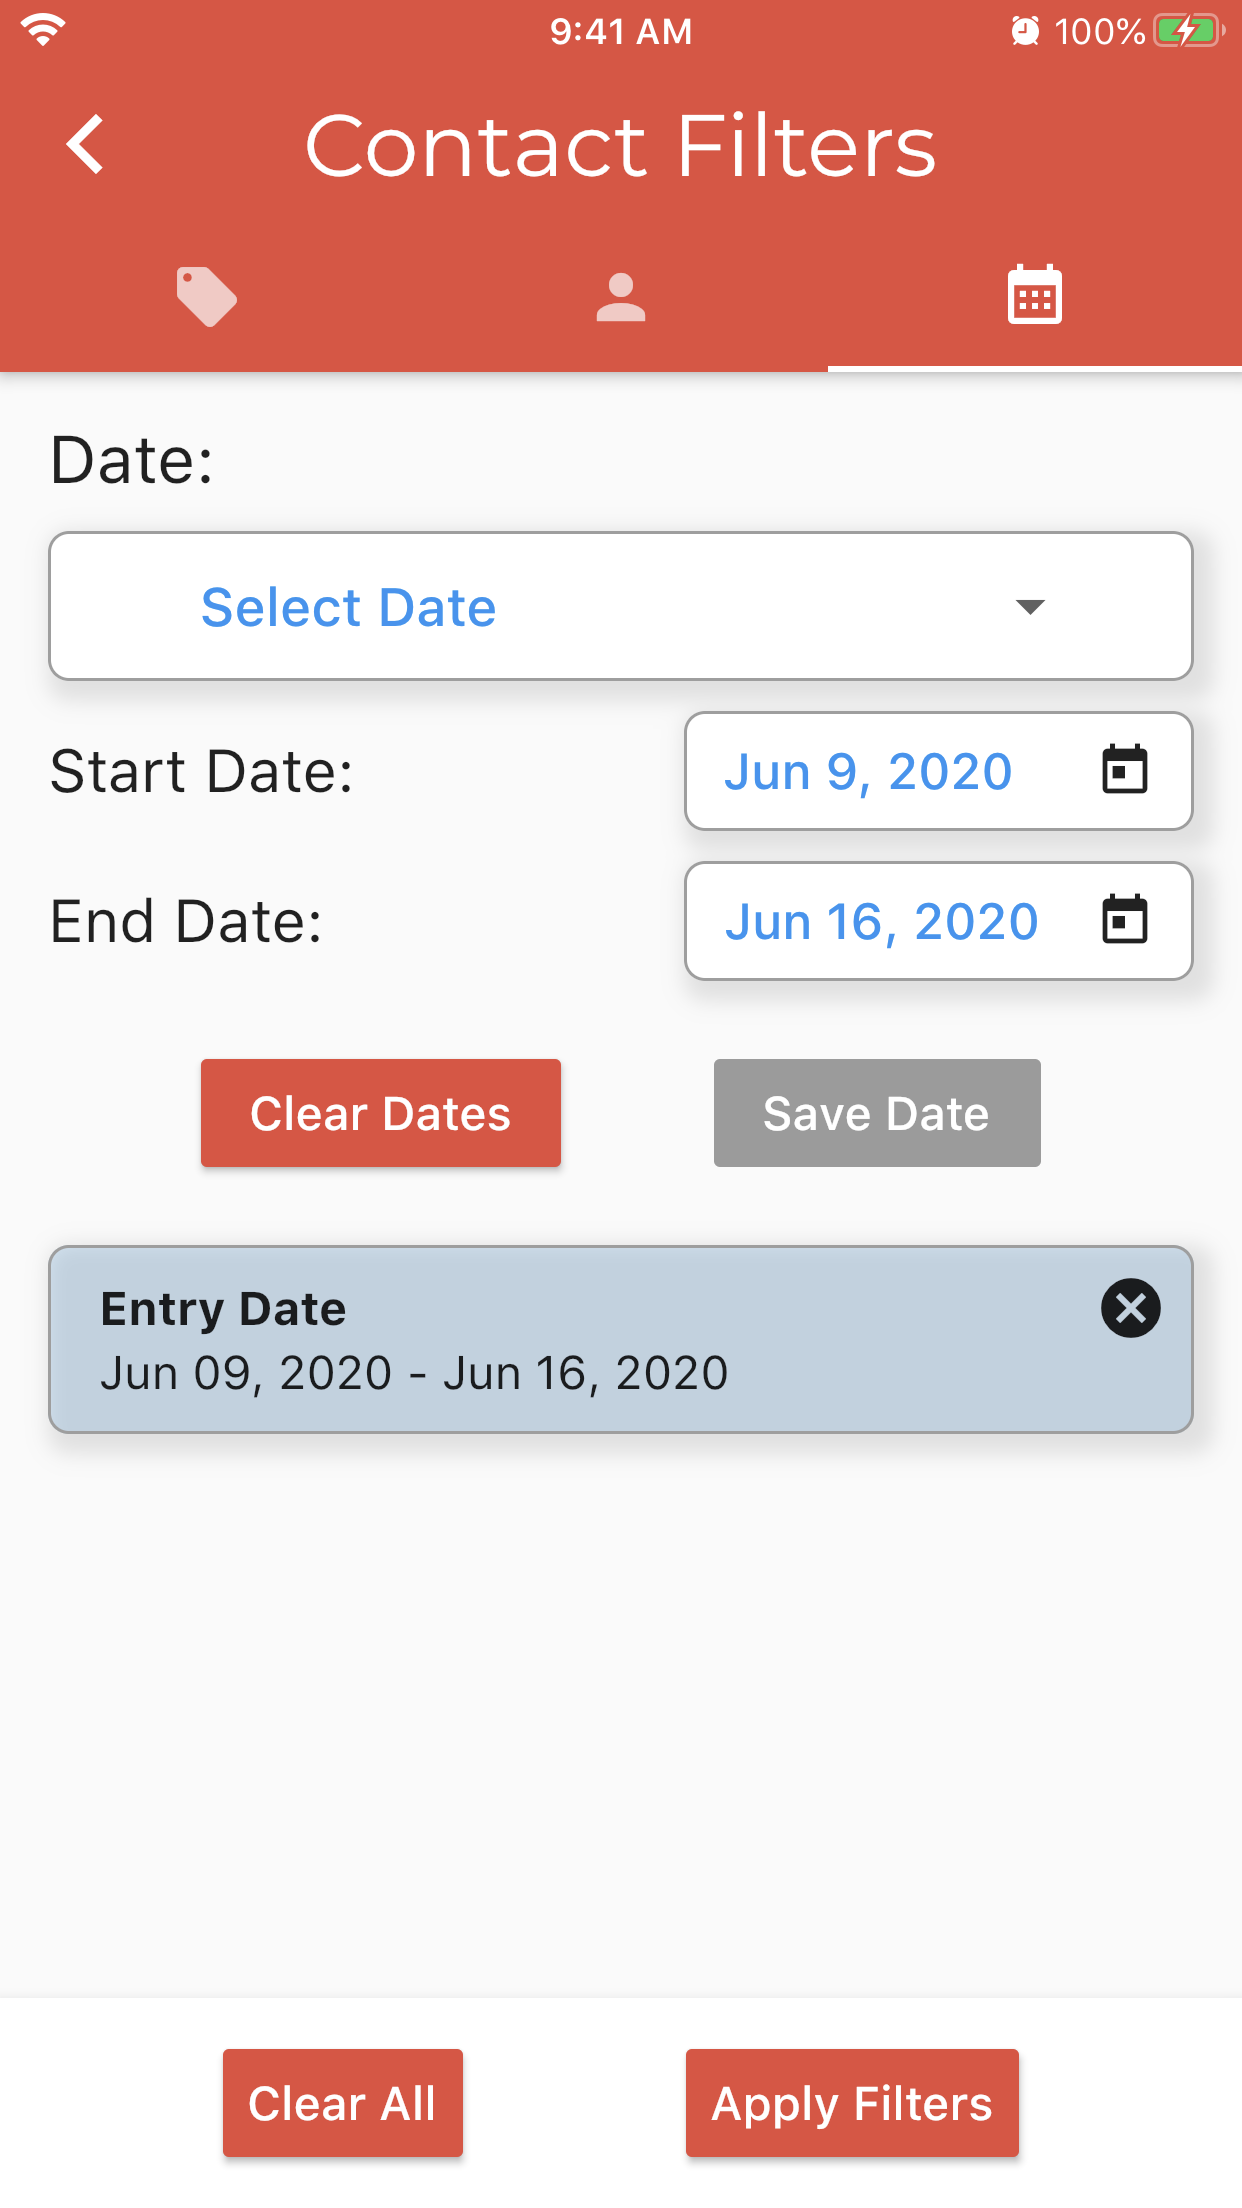
Custom Contact Filters (v2.0.5)
Click on the [Custom] button in the lower left to filter on fields which were not previously saved. This will display the list of available custom fields in 3 tabs: Tags, Contact Fields, Dates. Swipe between the 3 sections or click on the icons located at the top of the screen to switch between sections. Select or enter the criteria needed from any of the fields then click the [Apply Filters] button.
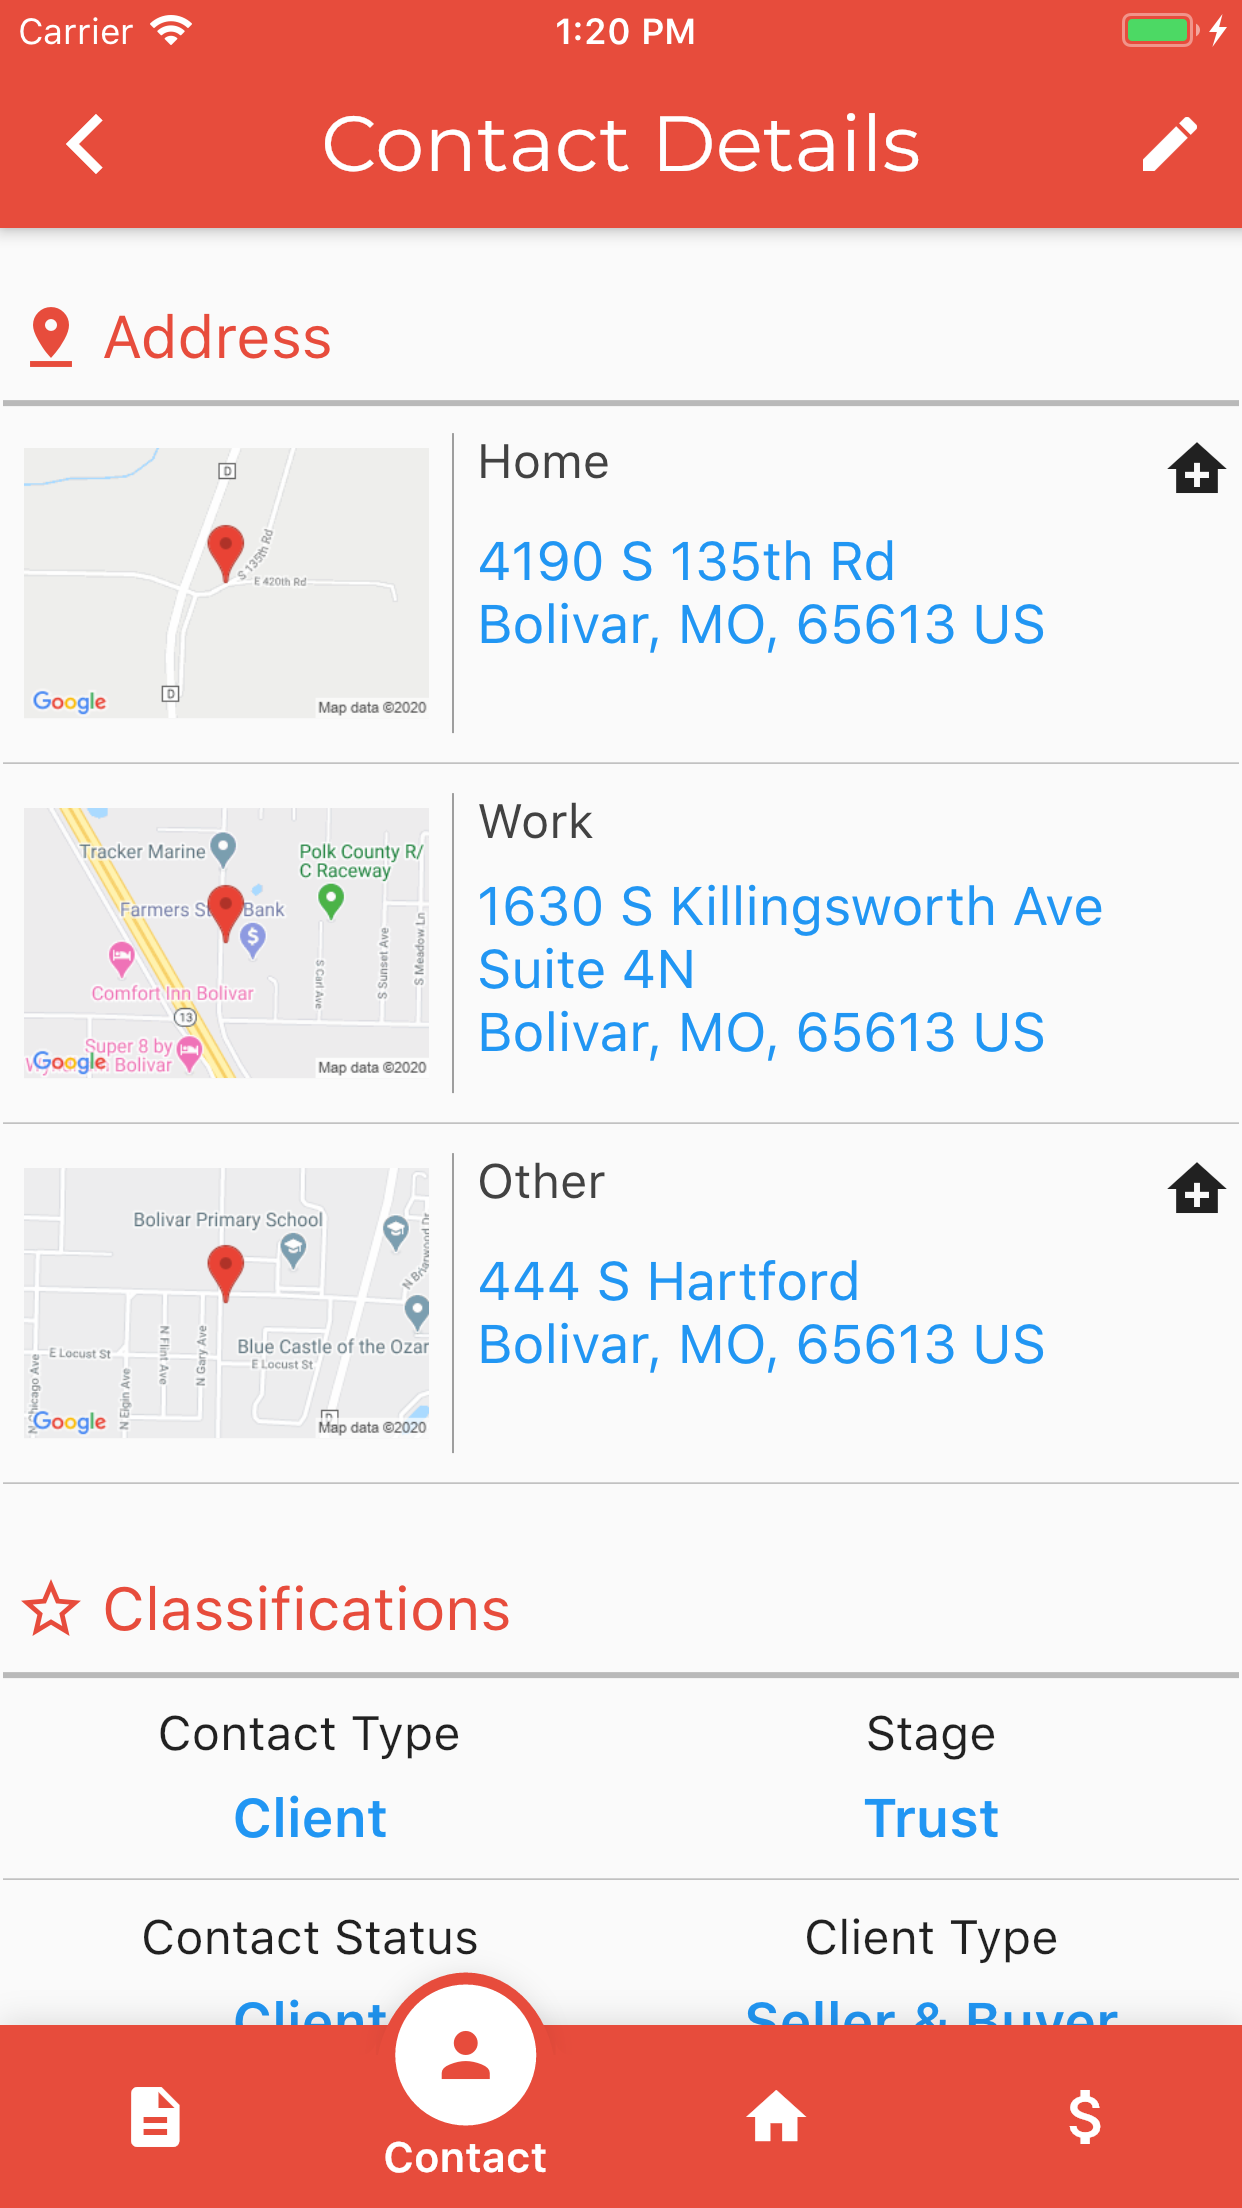
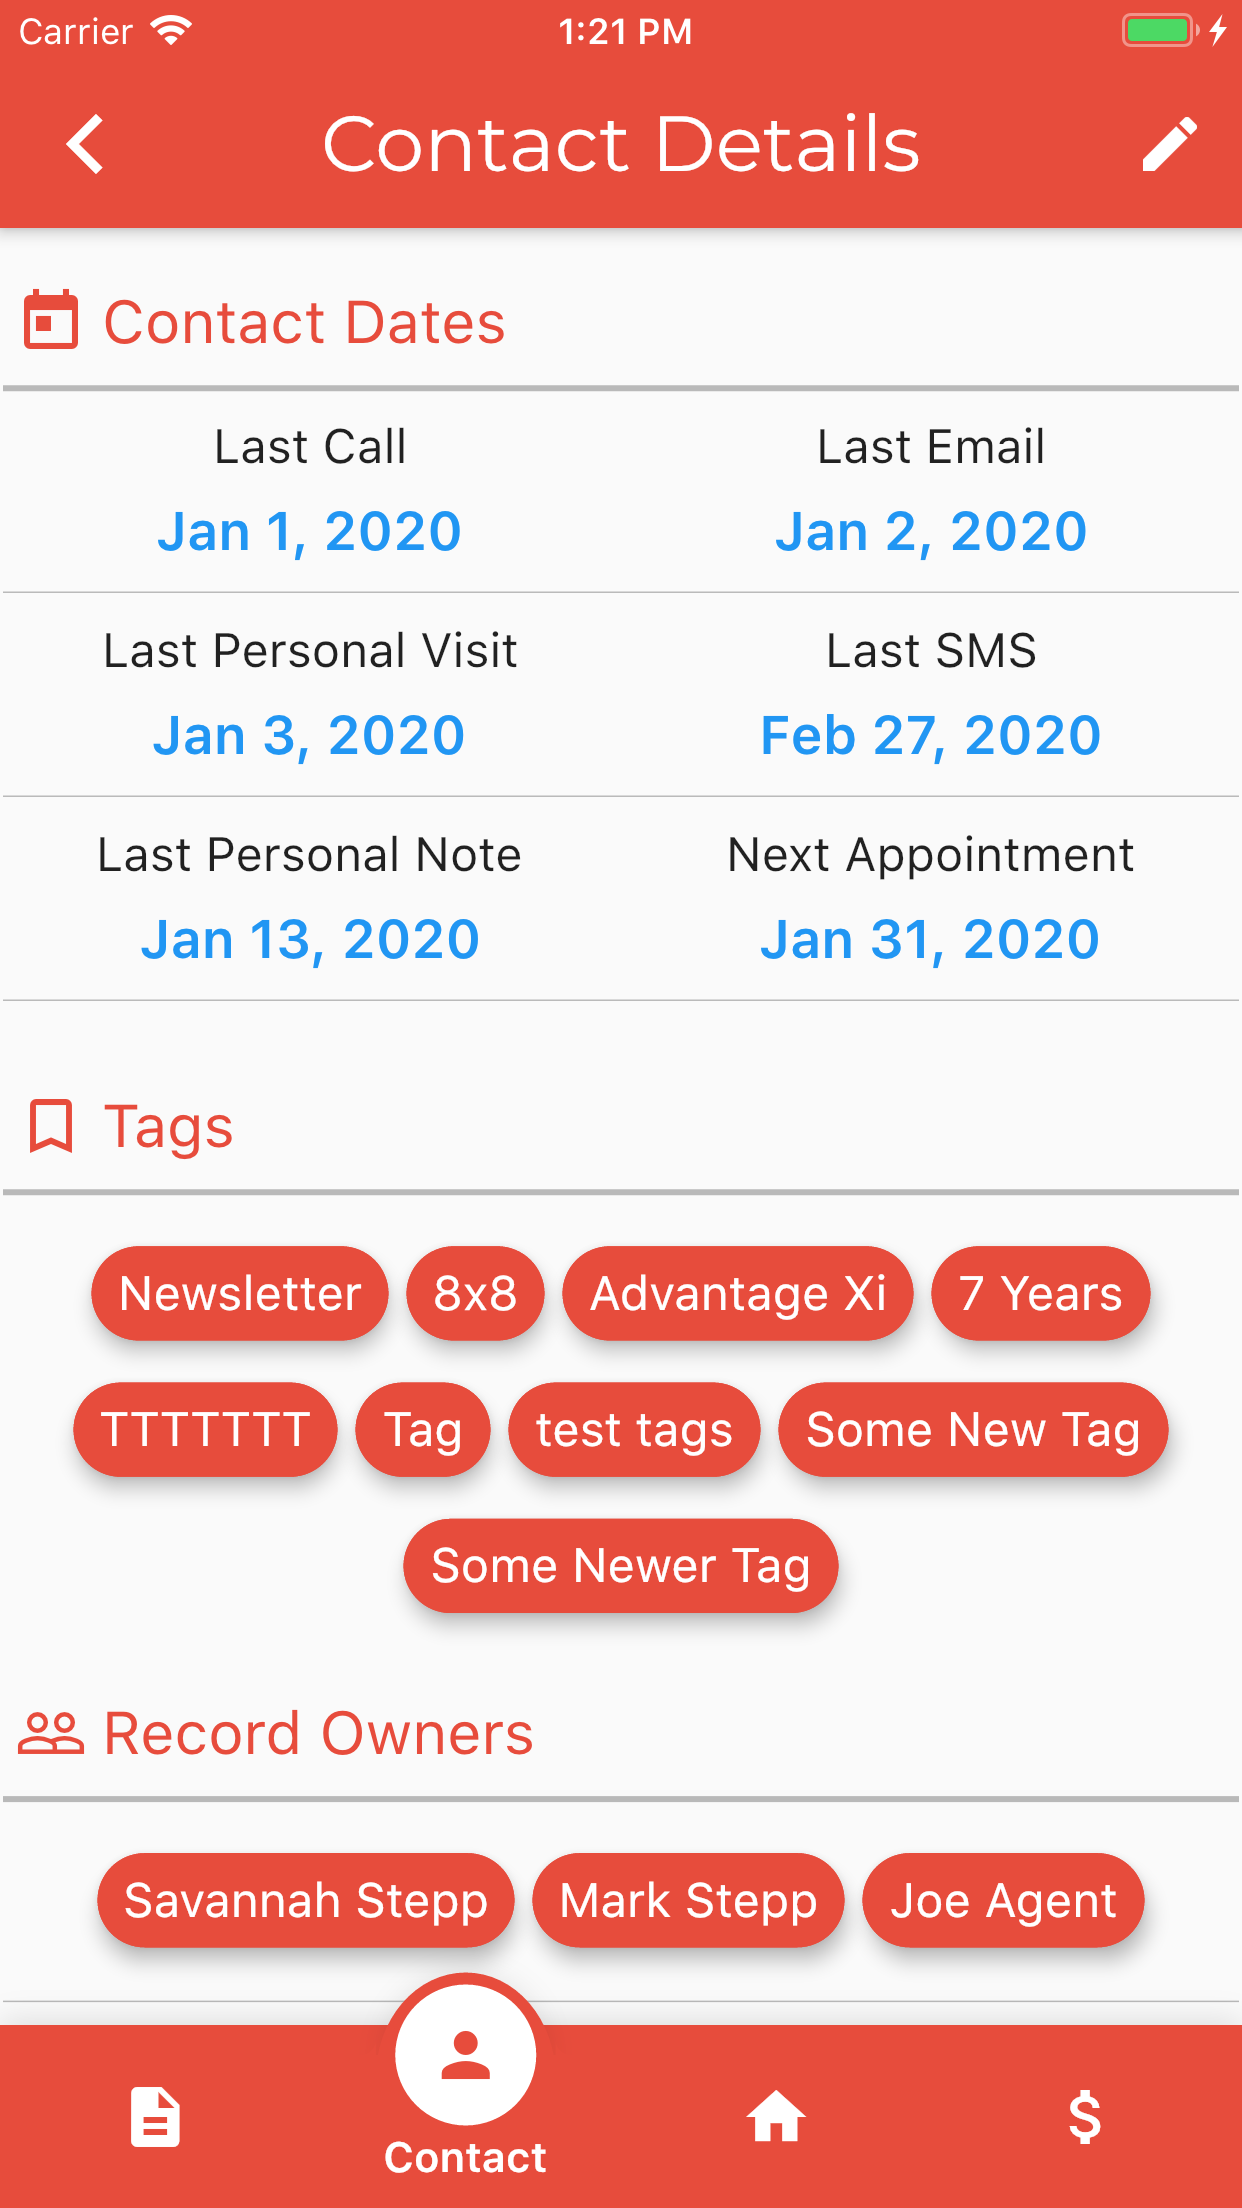
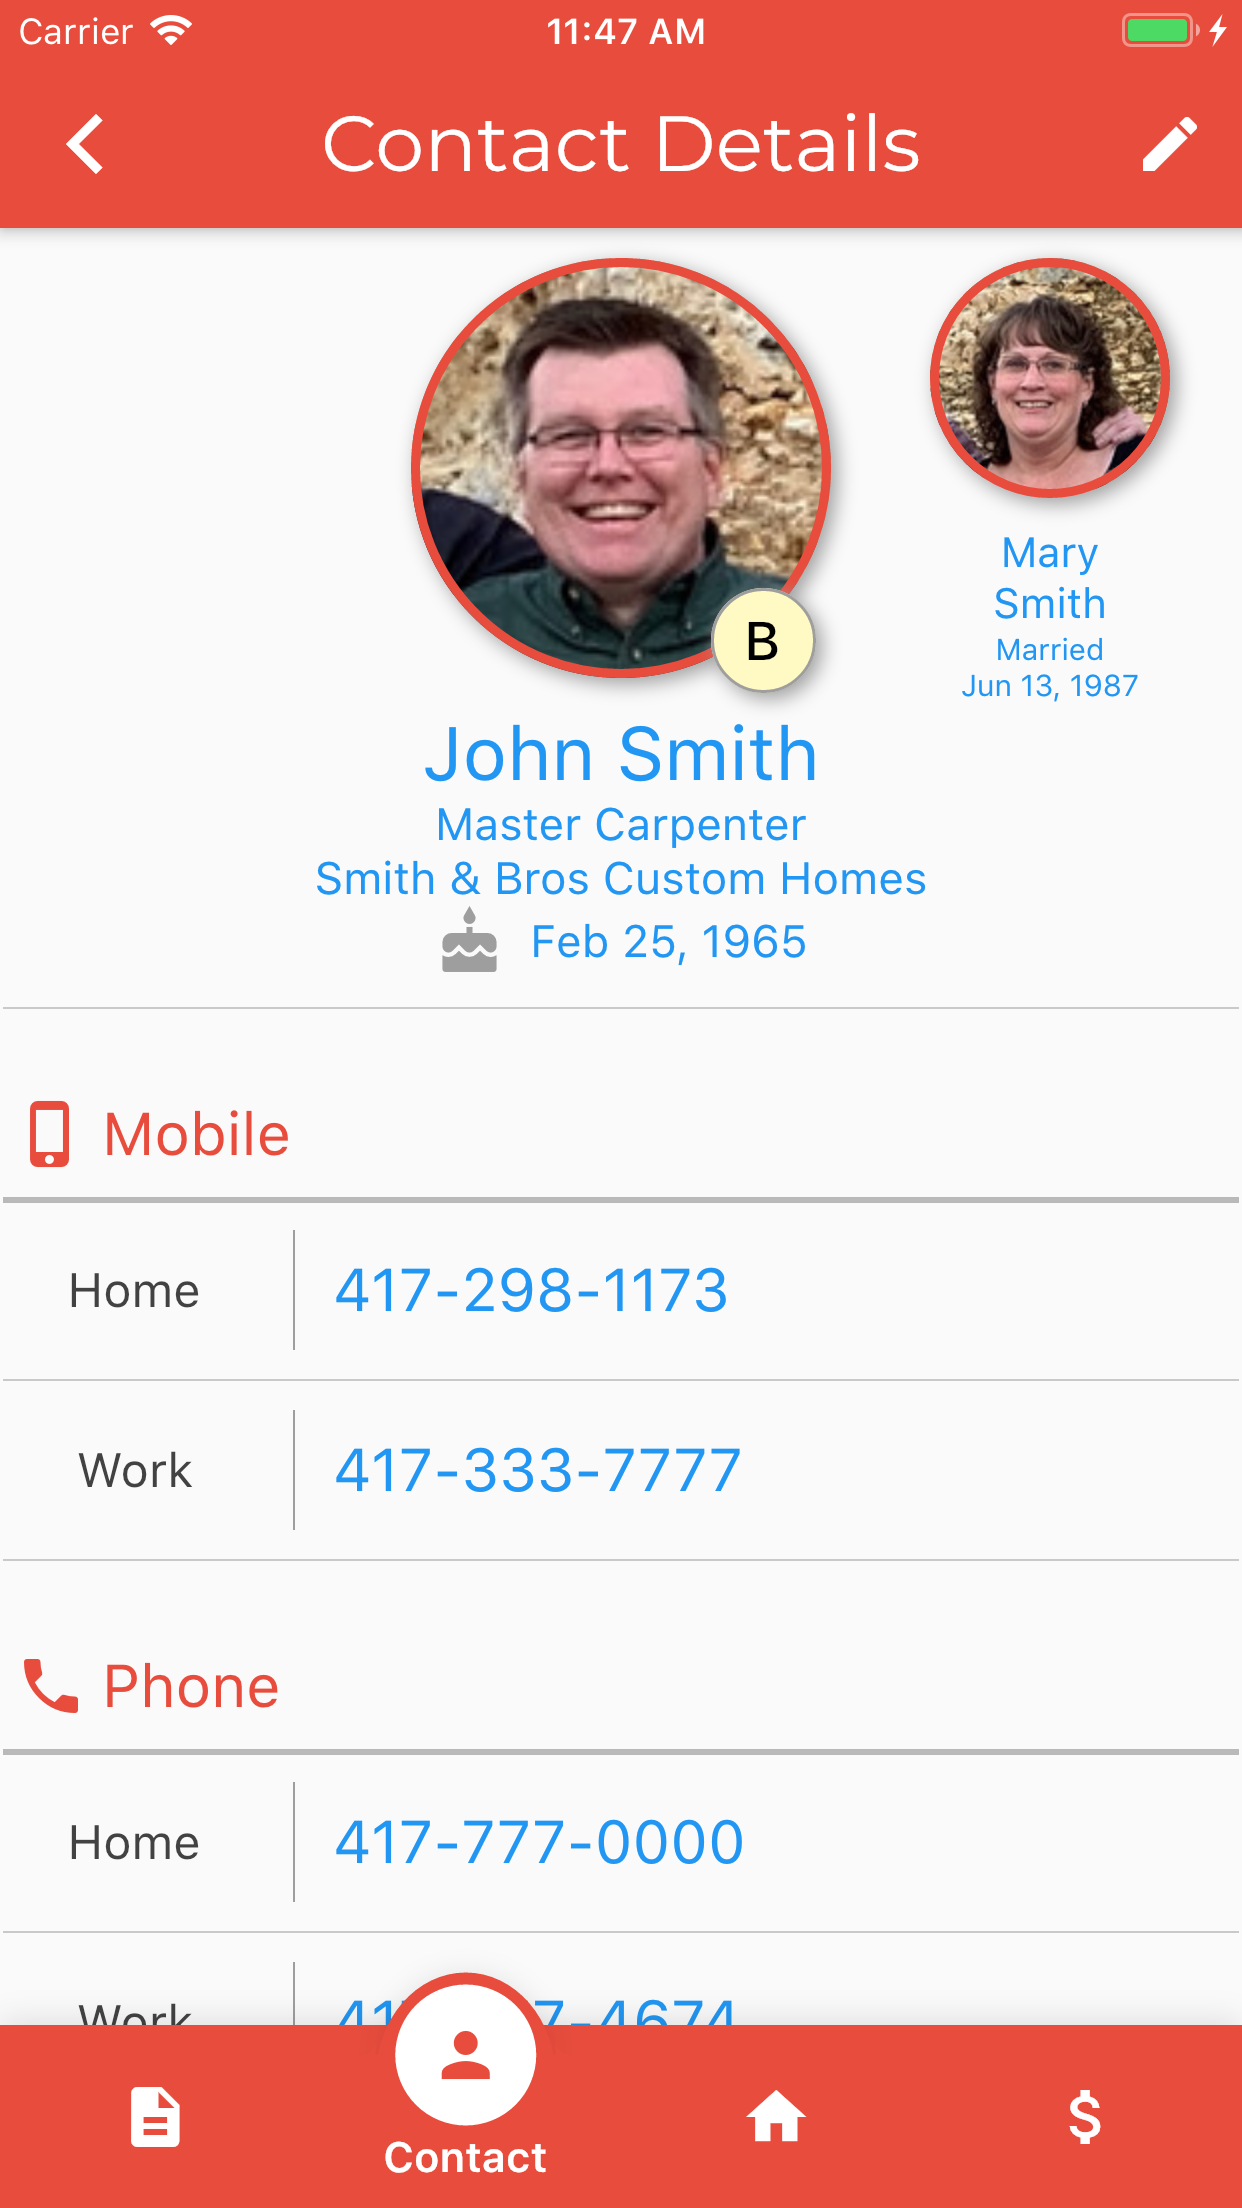
Contact Detail
The contact detail displays the information about the contact along with the linked spouse/partner. The buttons at the bottom of the screen allow you to display Notes, Contact Detail, Property (Listings), Transactions (Closings). Click on phone numbers to dial or send text, long press on a phone number to just enter wrap-up information about a call. The pencil in the upper right allows you to edit the contact’s detail.
Tap on the phone number to dial the contact or send SMS messages if a mobile number. Choose the option then follow the screen prompts.
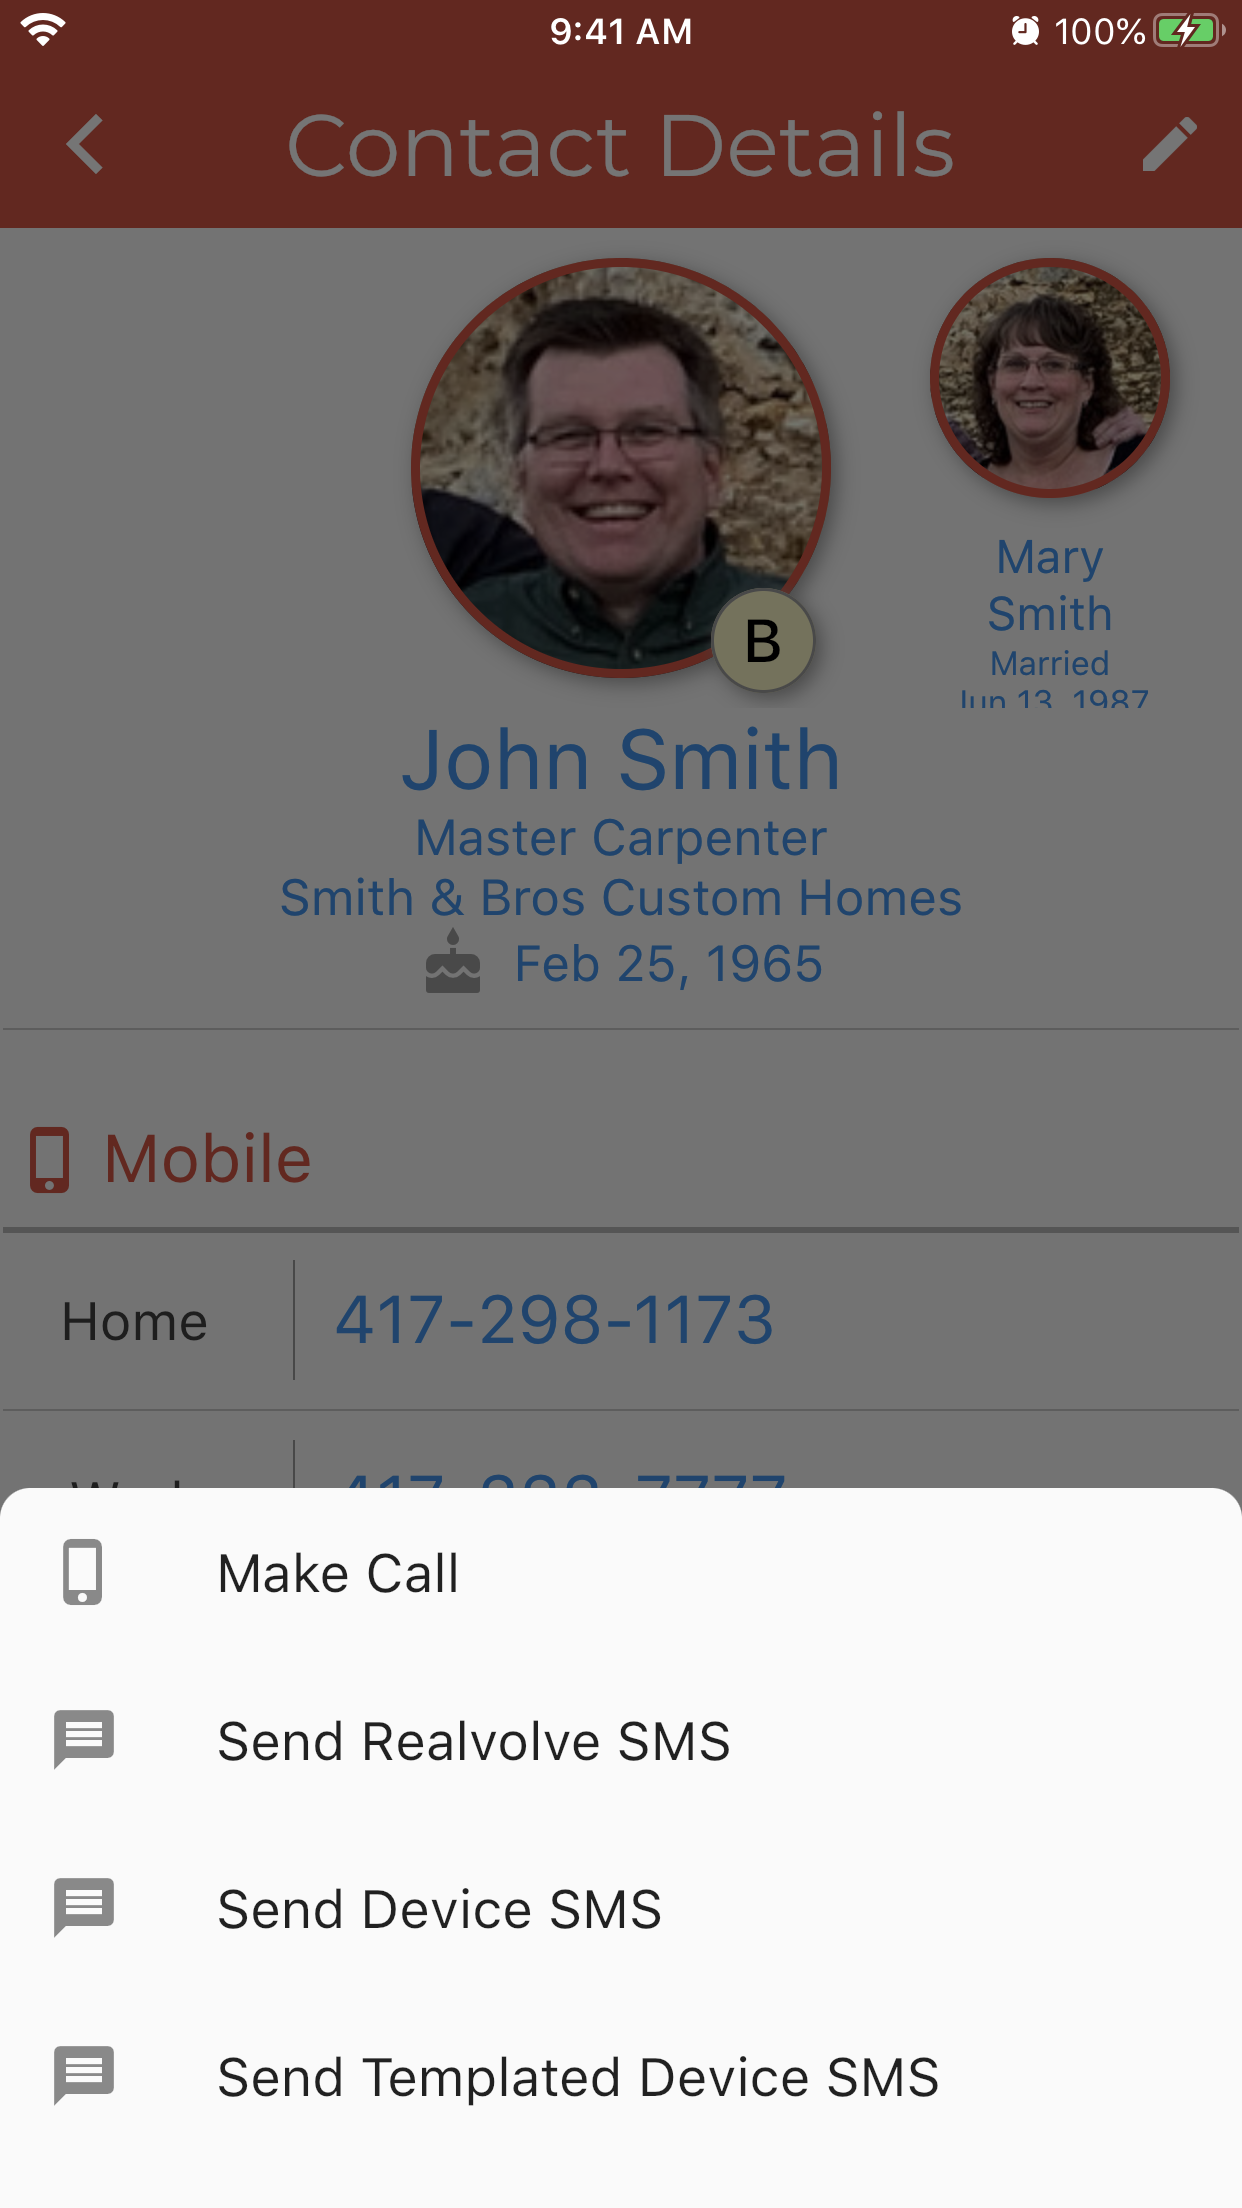
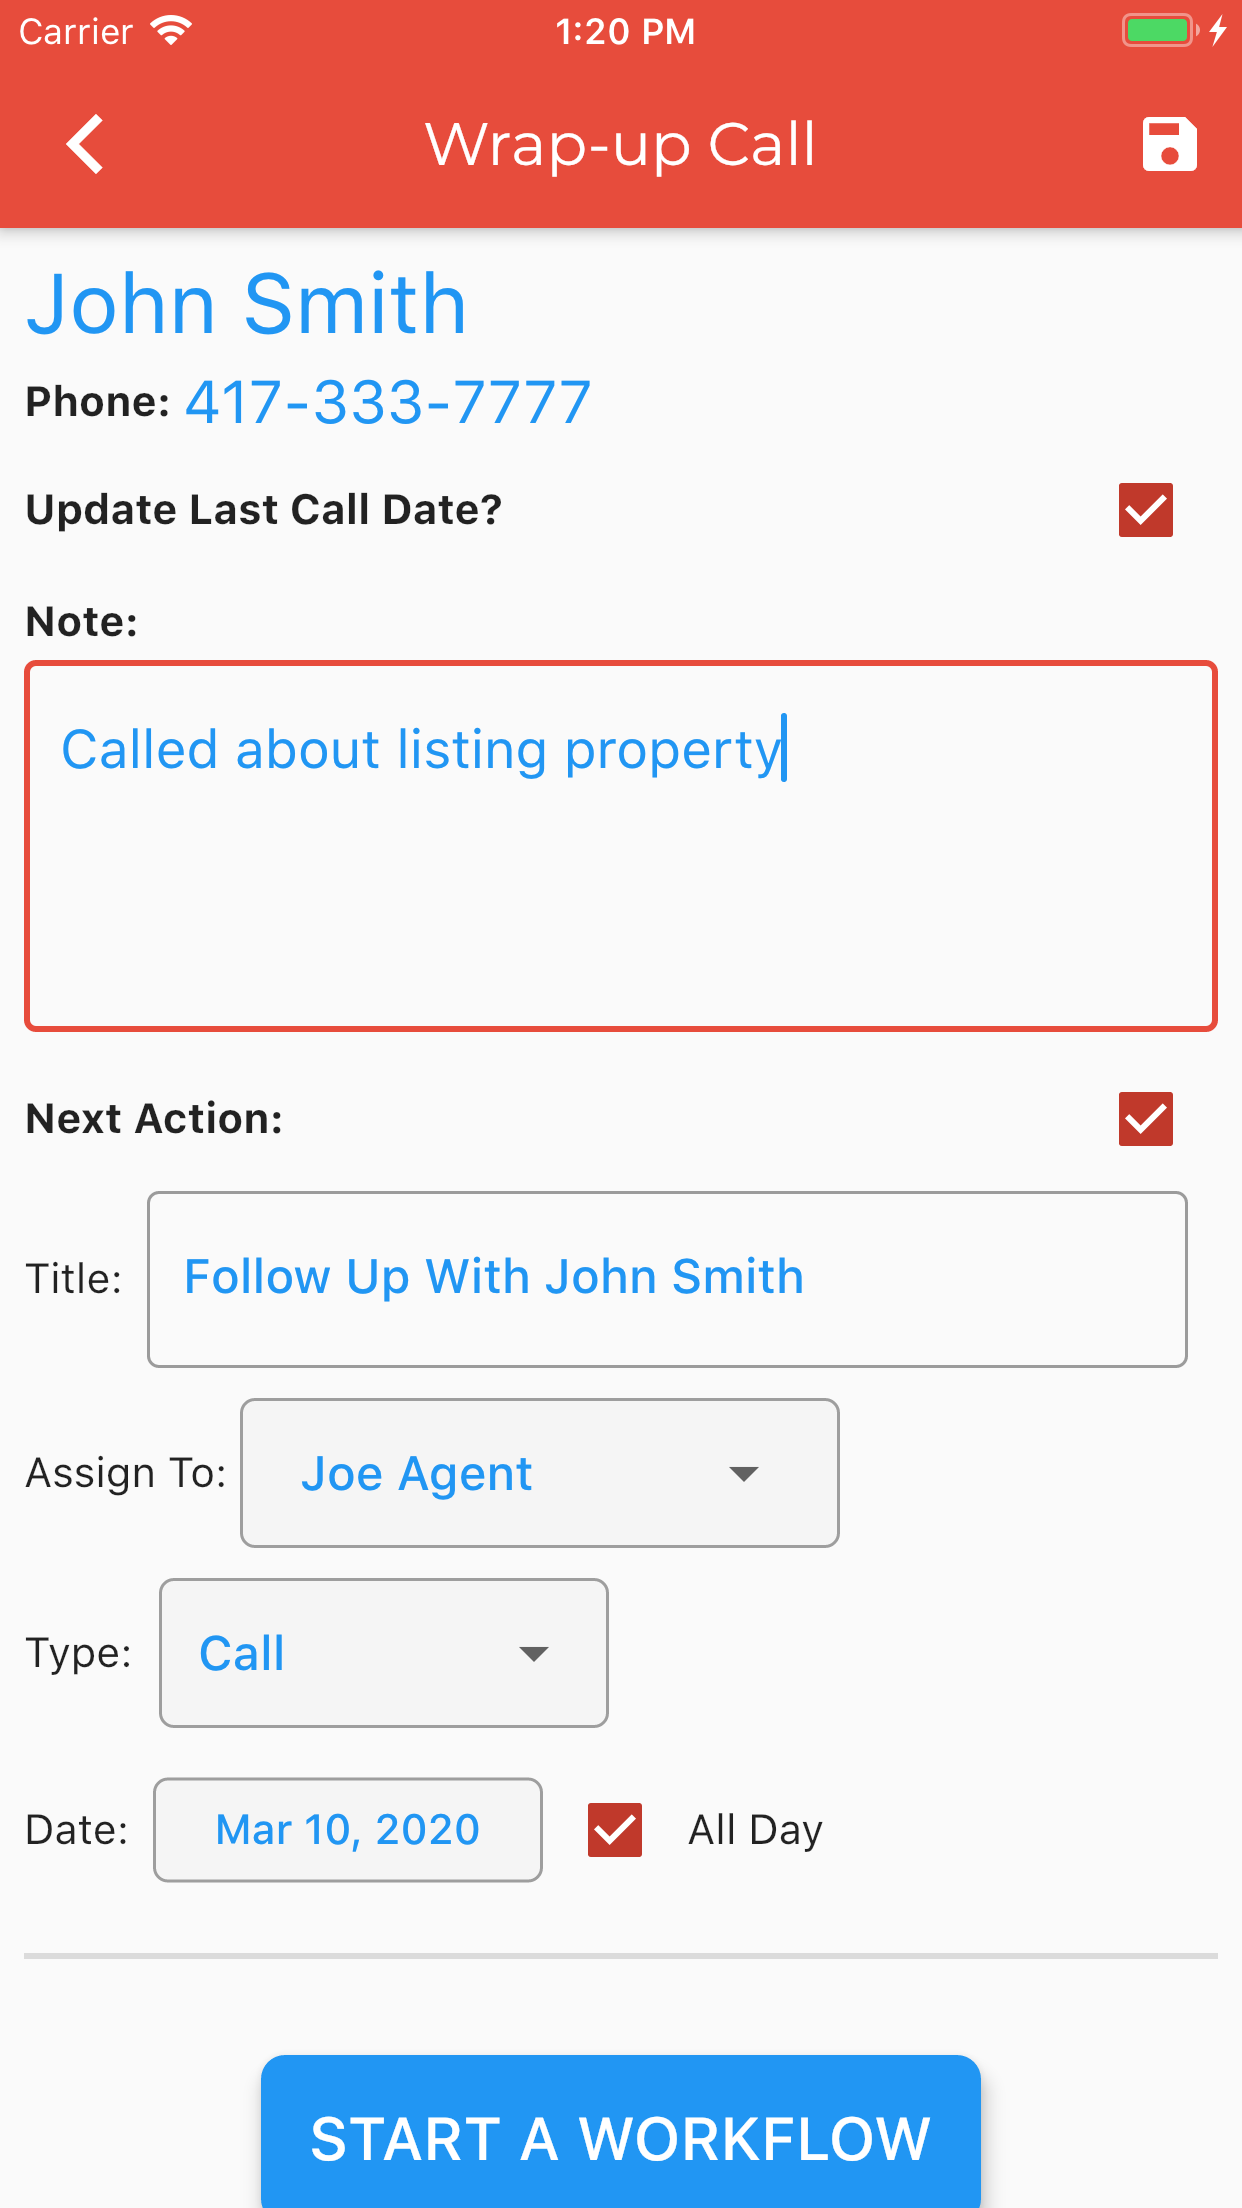
If you chose “Make Call” – once the call is completed a Wrap-up Call screen will display to enter additional information about the call
- Update the Last Call Date
- Add a Note
- Add a follow-up activity
- Start a workflow
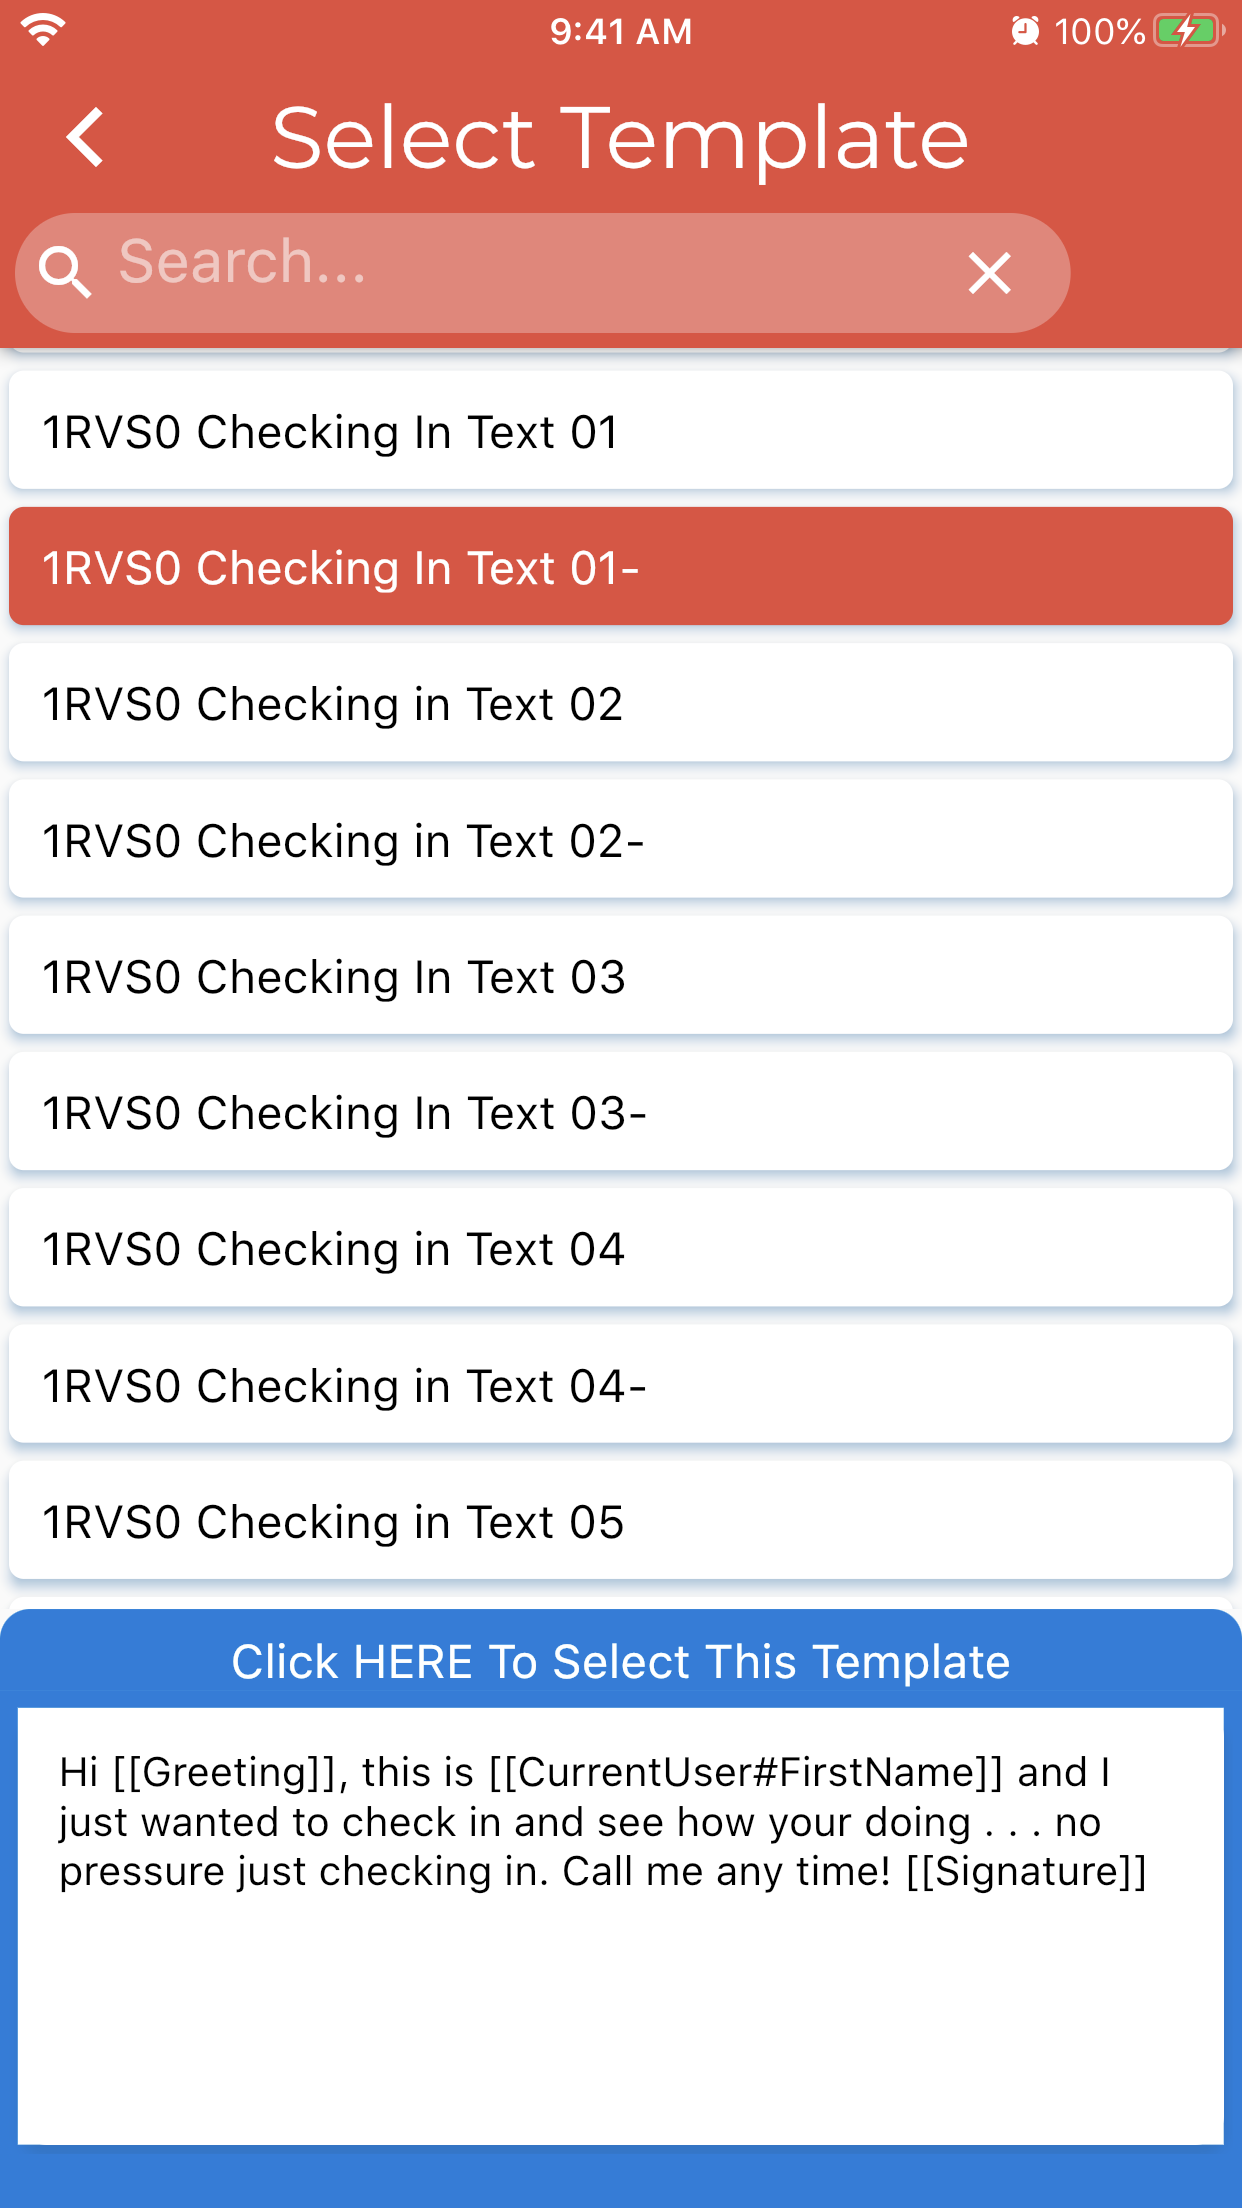
If you chose an SMS option with templates then you will be prompted to choose from the list of SMS templates in your account and then can edit/preview before sending. Device SMS options send using your phone’s SMS software and will not be tracked in the system. Use the Realvolve SMS to keep a record of all messages sent to your contact in the contact record. When using the Realvolve SMS to send messages the paper/magnifier icon on the right side will allow you to choose a template.
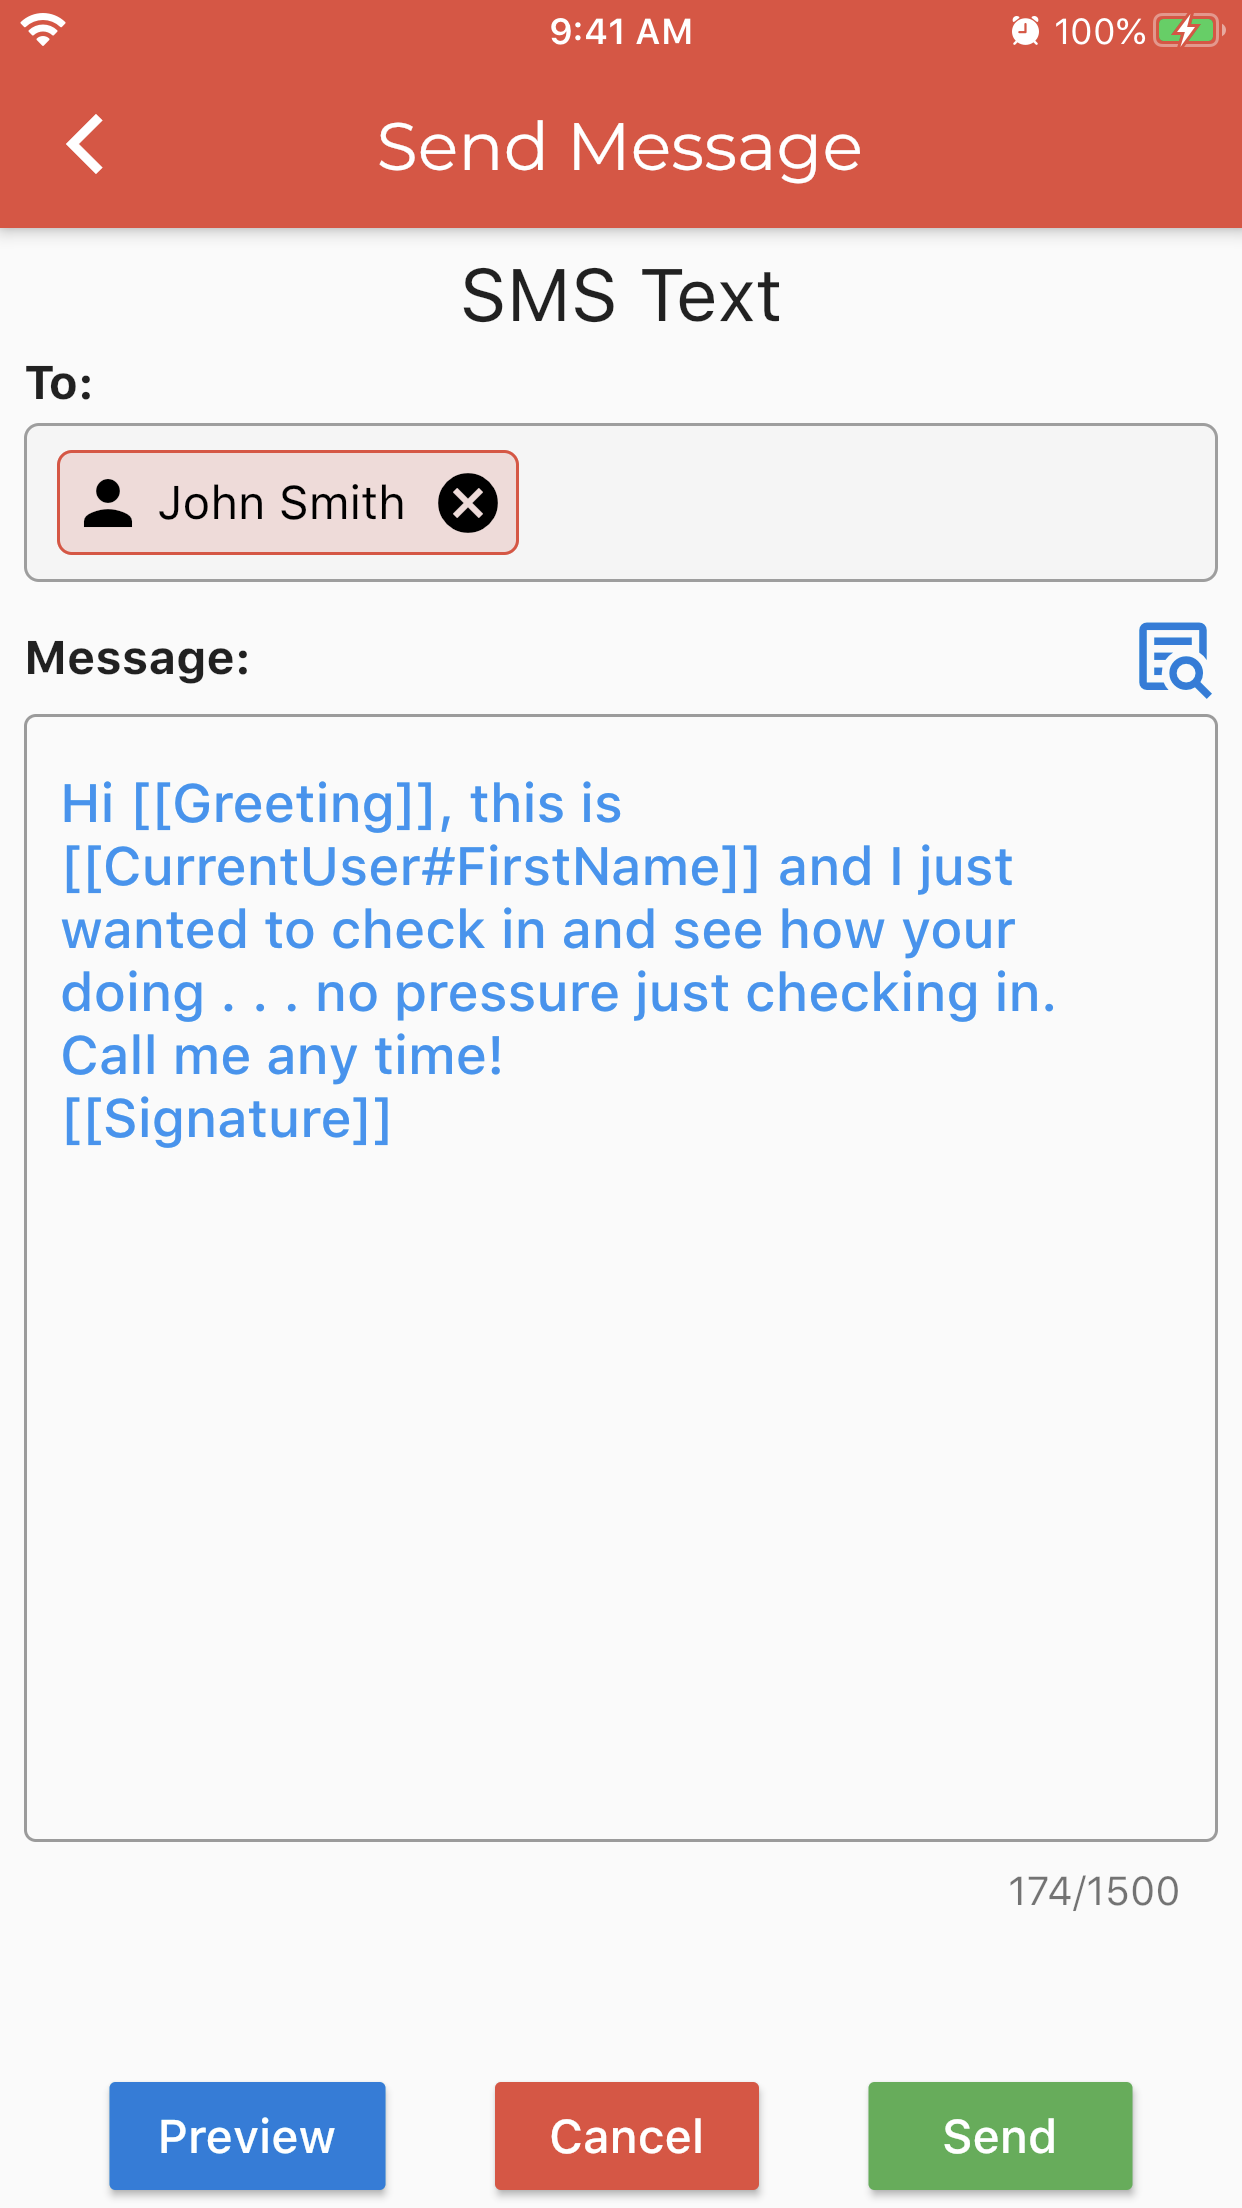
Scroll and Tap on a template then a preview window will appear at the bottom in blue – tap the preview to select the template for use.
Contact Emails (v2.0.5)
Click on the Email Address to send an email to a contact. The app will display a menu to choose from Realvolve Email or Device Email – Choosing the Realvolve Email will display the SEND MESSAGE window where you can type in a new message or use the Paper/Magnify icon to choose from the templates similar to SMS templates explained above.

Click the PREVIEW button to see the message with the merge fields filled in. Click the BACK arrows in the upper left to return to the editing screen to make changes and Send.
Contact Addresses (v2.0.4)
When viewing the Contact Detail screen, you can scroll to the Address section to see any Home/Work or Other addresses. Click on a map to get directions to that Address. Click on the HOUSE + icon to start a new Listing from the property. (NOTE: More property/transaction editing is coming soon)